There’s a ton of planning and organization that goes into any fundraising event because of the opportunity to connect with donors in person and rally support (and funds!) for your cause.
As you rely on donations to fund your projects and your cause, you may have invested in a giving kiosk as a quick and easy way to help accept contributions via credit and debit cards.
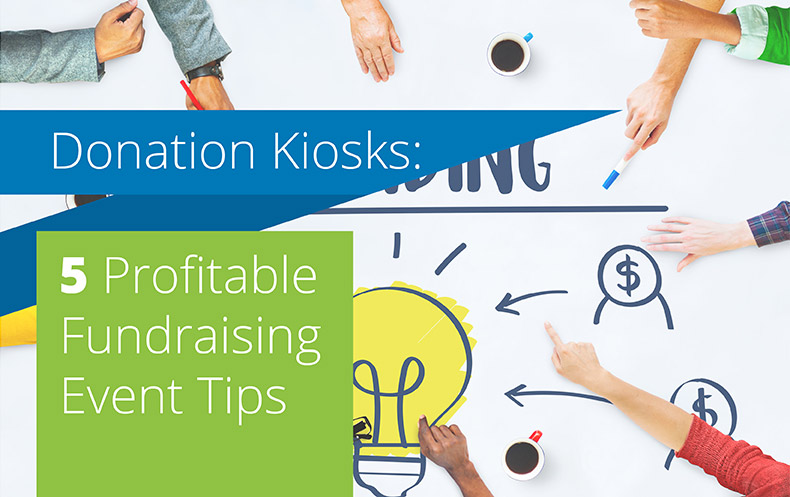
If you do have a donation kiosk, you’re probably also looking for a substantial return on investment. Lucky for you, we have 5 easy tips to follow to raise more money with your giving kiosk at your next fundraising event!
- Customize your donation kiosk
- Demonstrate how to use your giving kiosk
- Use your donation kiosk to research your donation history
- Choose the right location for your donation kiosk
- Promote your donation kiosk
If you need some help thinking of fundraisers, check out this list of 30 Innovative Fundraising Ideas for inspiration. If not, keep reading to learn how to use the full potential of your kiosk!
1. Customize your donation kiosk
Donors will be hesitant if they aren’t sure how much they’re donating or what cause they’re donating to. Branding your kiosk to your organization (whether you’re a nonprofit or church) will help you look professional and build trust with donors, leading to more donations. Check out these tips on customizing your kiosk!
Make a card
Your giving kiosk can be accompanied by a small card, roughly 4 inches by 6 inches, that explains what your nonprofit does and why your cause is so important. This will immediately inform donors so there’s little room to worry about where their money is going and what it’s supporting.
Create a sign
If a card is too small for all the information you’d like to share about your organization, think about making a sign. Your sign can range in size from a sheet of paper to a banner that hangs on your donation table.
Design a sticker
If making a card or creating a sign still doesn’t get your point across, customize your donation kiosk directly. You can make a sticker of your nonprofit’s logo to put right on the face of your kiosk. This way, the device itself is branded to your nonprofit, and there’s no room for confusion.
The takeaway: While you should always be at your donation table to answer any questions and provide additional assistance, customizing your kiosk will help minimize the number of questions that arise. Customizing your donation kiosk is about being transparent. If donors know how much they’re giving and who they’re giving to right off the bat, there’s a higher chance they’ll continue with a donation.
2. Demonstrate how to use your giving kiosk
Many of your donors may have never used a donation kiosk before. And even if your donor has used a giving kiosk before, they still might not understand how yours works. You have to remember that on top of being relatively new devices, kiosks come in plenty of different shapes, sizes, colors, and functionalities.
Take a look at these steps to help perfect your demonstration skills.
Simplify your steps
The donor may need to tap your device’s screen to wake up the software before beginning. They also may need to select a donation amount and enter some personal information before they slide or insert their cards.
You’ll want to make sure your kiosk doesn’t require more than 3 steps, so you don’t risk donation abandonment. The fewer steps the better. There are devices that are extremely simple if you’re interested in providing your supporters with one-step donation kiosks.
It’s your organization’s job to shop accordingly and be wary of kiosks that aren’t worth your time and will only complicate your donation process.
Include suggested amounts
If your kiosk gives you the option and doesn’t have a singular preset donation amount, give your supporters amounts that range in monetary value. You’ll never want to have starting donations set too high because, again, that will only lead to donation abandonment. Take a look at your donors’ profiles, including their incomes, to determine an appropriate preset amount.
Including suggested amounts will also help to keep your transaction time to a minimum so your supporters can spend more time getting involved and learning about your cause.
Accept all card types
Make sure your donation kiosk’s software can accept all cards — stripe or chip.
Preferably, you’ll want to look for a giving kiosk that has one process for accepting payments to avoid confusing your supporters mid-donation.
The takeaway: While the goal is to have a kiosk so easy to use, it won’t need explanation, questions almost always arise. To minimize the amount of confusion around your kiosk, you’ll want to simplify the number of steps in a transaction, include suggested donation amounts, and accept all credit and debit card types.
3. Use your donation kiosk to research your donation history
What does this have to do with your giving kiosk? Everything! As previously mentioned, you’ll want to offer preset donation amounts to keep the transaction speedy; and in order to offer appropriate and manageable giving amounts, you’ll need to know your donors.
Know your supporters
You’ll need to keep your donors in mind at all points throughout your fundraiser. You should know their basic information, like their name, town, interests, and salary. Check out Identifying Major Donors: 11 Top Strategies and Tools for some tips on where to look for your biggest donations.
Depending on your organization and your donor profiles, you could offer donation amounts starting at $5 and progressing to $50. So for example, if you’re a small nonprofit animal shelter and most of your donors make around $30,000 a year, you should consider setting the starting preset donation amount at $5, not $50.
This way, your preset donation will fit within your supporters’ budgets more comfortably and won’t immediately turn anyone away.
Catering to your donors’ financial abilities will only help to increase the number of donations your nonprofit sees.
Know your time, date, and location
Look at your calendar and your watch, and make note of where you’re fundraising because all of these elements affect your donations.
For example, nonprofits will want to establish giving amounts based on the tone of the event. An outdoor summer event that takes place in the day would likely have a smaller base donation amount than a gala that takes place in an evening venue.
In contrast, churches may want to incorporate giving kiosks into a special event sermon as an alternative to traditional tithing (check out this Snowball resource for more information on online tithing!). Sermons that occur in the beginning or end of the event will be most impactful.
The takeaway: If you’ve recently acquired your donation kiosk, you might not know what donation amounts to expect in which locations. You can judge off of your supporters’ income while you take time and location into consideration before setting your preset amounts.
4. Choose the right location for your donation kiosk
Now that you know time, date, and location affect your donations, focus on where to ask for donations at your event, whether it’s a silent auction or a walkathon.
Pick a high-trafficked area
Obviously, you won’t want to place your kiosk at the back of your event in a corner, but you’ll want to display it prominently. Depending on your event type, you can place your donation kiosk next to your registration or check-in table in a place every attendee can’t miss.
For example, universities can fundraise with a donation kiosk during campus events (think: an alumni fundraising event) by placing the device on a table near the entrances and exits. That way, guests will encounter your donation kiosk twice, giving them more opportunities to give to your school.
To make your kiosk stand out even more, place a sign beside it that explains why you’re raising money.
If your event is outdoors, pay special attention to the weather, as attendees will likely migrate to shade during the hottest hours of the day.
Create a designated spot
If your event is bigger, try setting up a designated table just for accepting donations. If you have a simple, one-step donation process, you can even incorporate your giving kiosk into your registration table.
Additionally, when your donation kiosk is in a location that’s easily visible, other event attendees will see other using your device. Seeing others guests give is another proven way to encourage others to do the same!
And more importantly, avoid donation abandonment. If your donations line is too hard to get to, donors will be easily discouraged. Using a donation kiosk with a quick and simple process means your supporters won’t have to wait in a long line just to give to your cause, making it easy for them to get back to enjoying your event.
The takeaway: Where you place your donation kiosk at your fundraising event can make all the difference. Make sure it’s easy to find and accessible for all event attendees so you don’t miss out on any potential contributions.
5. Promote your donation kiosk
When you’re promoting your fundraising event, don’t forget to promote your donation kiosk, too! Like we said earlier, kiosks are a recent acquisition for the nonprofit fundraising sector.
Put it on your website and in your newsletter
This is the perfect place to promote your donation kiosk because supporters are accessing your nonprofit website to learn more about your cause and upcoming events. When it comes to your newsletter, your supporters are already interested in keeping up with any progress and improvements your organization is making so they’ll be thrilled to learn about your donation kiosk there.
Use word-of-mouth
Of course, you can promote your kiosk the good, old fashioned way. Word-of-mouth will get people discussing your donation kiosk, and it may actually reach your less tech-savvy supporters faster than online promotion will. At events, make sure your staff and volunteers know to talk up the kiosk, and you can even have your emcee make an announcement.
Share via social media
If your nonprofit has a website, it’s most likely not your only online presence or platform. Make sure you tweet, post, and share pictures of your donation kiosk online so your supporters will know what to look for at your next event. You can even post instructional photos or videos so they’ll have a gist of how to use the device, too!
The takeaway: In order to use your kiosk to its full potential, you’ll want to promote it on your website and in your newsletter, as well as via social media and word of mouth. The more people know about your donation kiosk, the more donations you’ll receive through it.
When you plan your next fundraising event, plan to incorporate these steps, too, to capitalize on your fundraising potential.
Like many organizations post-event, you may be asking “what’s next?” A giving kiosk can be useful for churches and nonprofits outside the scope of events as well. To learn more, take a look at these church management tips.
Additional Resources
- Snowball’s Top 9 Free Nonprofit Software Solutions. Nonprofit software can help your organization supplement your donation kiosk efforts. Take a look!
- Snowball’s Online Tithing Tools: 15 Important Questions To Ask. Churches who use donation kiosks can further engage congregants and followers with online tithing. See how!
- DipJar’s 7 Must-Have Donation Kiosk Features for Fundraising Success. Looking for even more tips? Check out this article to see your donation kiosk through to its full potential.